
Shellac Shenanigans
A brief account of shellacking adventures

Shellac is a resin secreted by what is known as a lac bug, and has several uses. Well, the liquid form of it does — which is formed when the shellac flakes are dissolved in denatured alcohol. I got to know about it while reading the book ‘Just Ride’, by Grant Petersen.
In one of the final chapters, he discusses how the application of shellac coating on the handlebar tape not only makes it rainproof but also renders an aura of sophistication. A brief research online1,2, and I came to understand his point— the outcome was truly captivating! Grant Petersen also delves into the evolving aesthetic of the handlebar tape, highlighting not only its initial appearance but also the interesting part wherein the gradual wearing off of the coating unveils a spectrum of rich, earthy hues, resulting from a fusion of the shellac layers and the colour of the underlying tape.
This was enough evidence for me to embark on the journey of shellacking my bike’s handlebar. It was interesting in that, obtaining shellac flakes was easier than I imagined — maybe because India is one of the primary places of its production. The friendly hardware store vendor also recommended the solvent that went with it. The hard part was getting a cloth-based bar tape — since that’s not a prevalent material when it comes to bar tapes. This was followed a long and patient wait for procuring it from a abroad.
Anyway — I ended up getting an bright Orange one, since with shellac coat(s), I was hoping it to come to a burnt red/maroon finish — both of which are colours that’d gone well with the colour of my bike.
Shellac flakes take about a day or so to get dissolved in the solvent. I took some guesses into how much would be required for the amount of solvent I was taking — roughly (~50gms for 150ml). Based on the suggestions online, I put two coats, while allowing the first one to dry before putting the next one. Since it was my first time I was clumsy — ended up dropping the liquid all over, spilling it to the parts where I did not intend, and what not. However, the outcome was decent enough. Although, in haste, I did not allow it to dry enough, and ended up riding the bike, and have my fingerprints all over the half-dried coats. So year, more than clumsy!
After about 3 years or so, since the bike went a recent overhaul — I decided to go for a touch-up for the shellac coats as well. This time around I wanted to give it its own sweet time, and encash on the lessons I learnt last time! So after having dissolved the shellac, I went for a generous first coat. I had also secured other parts of the bike (tyres, front fork, etc.) to save them from the outcome of these “generous” amounts of liquids being dealt with! Luckily, thanks to the remanent coat from last time, the first coat dried quite quickly — say in about couple of hours or so. I then proceeded with another coat, and left the bike to dry for about 4 hours or so.
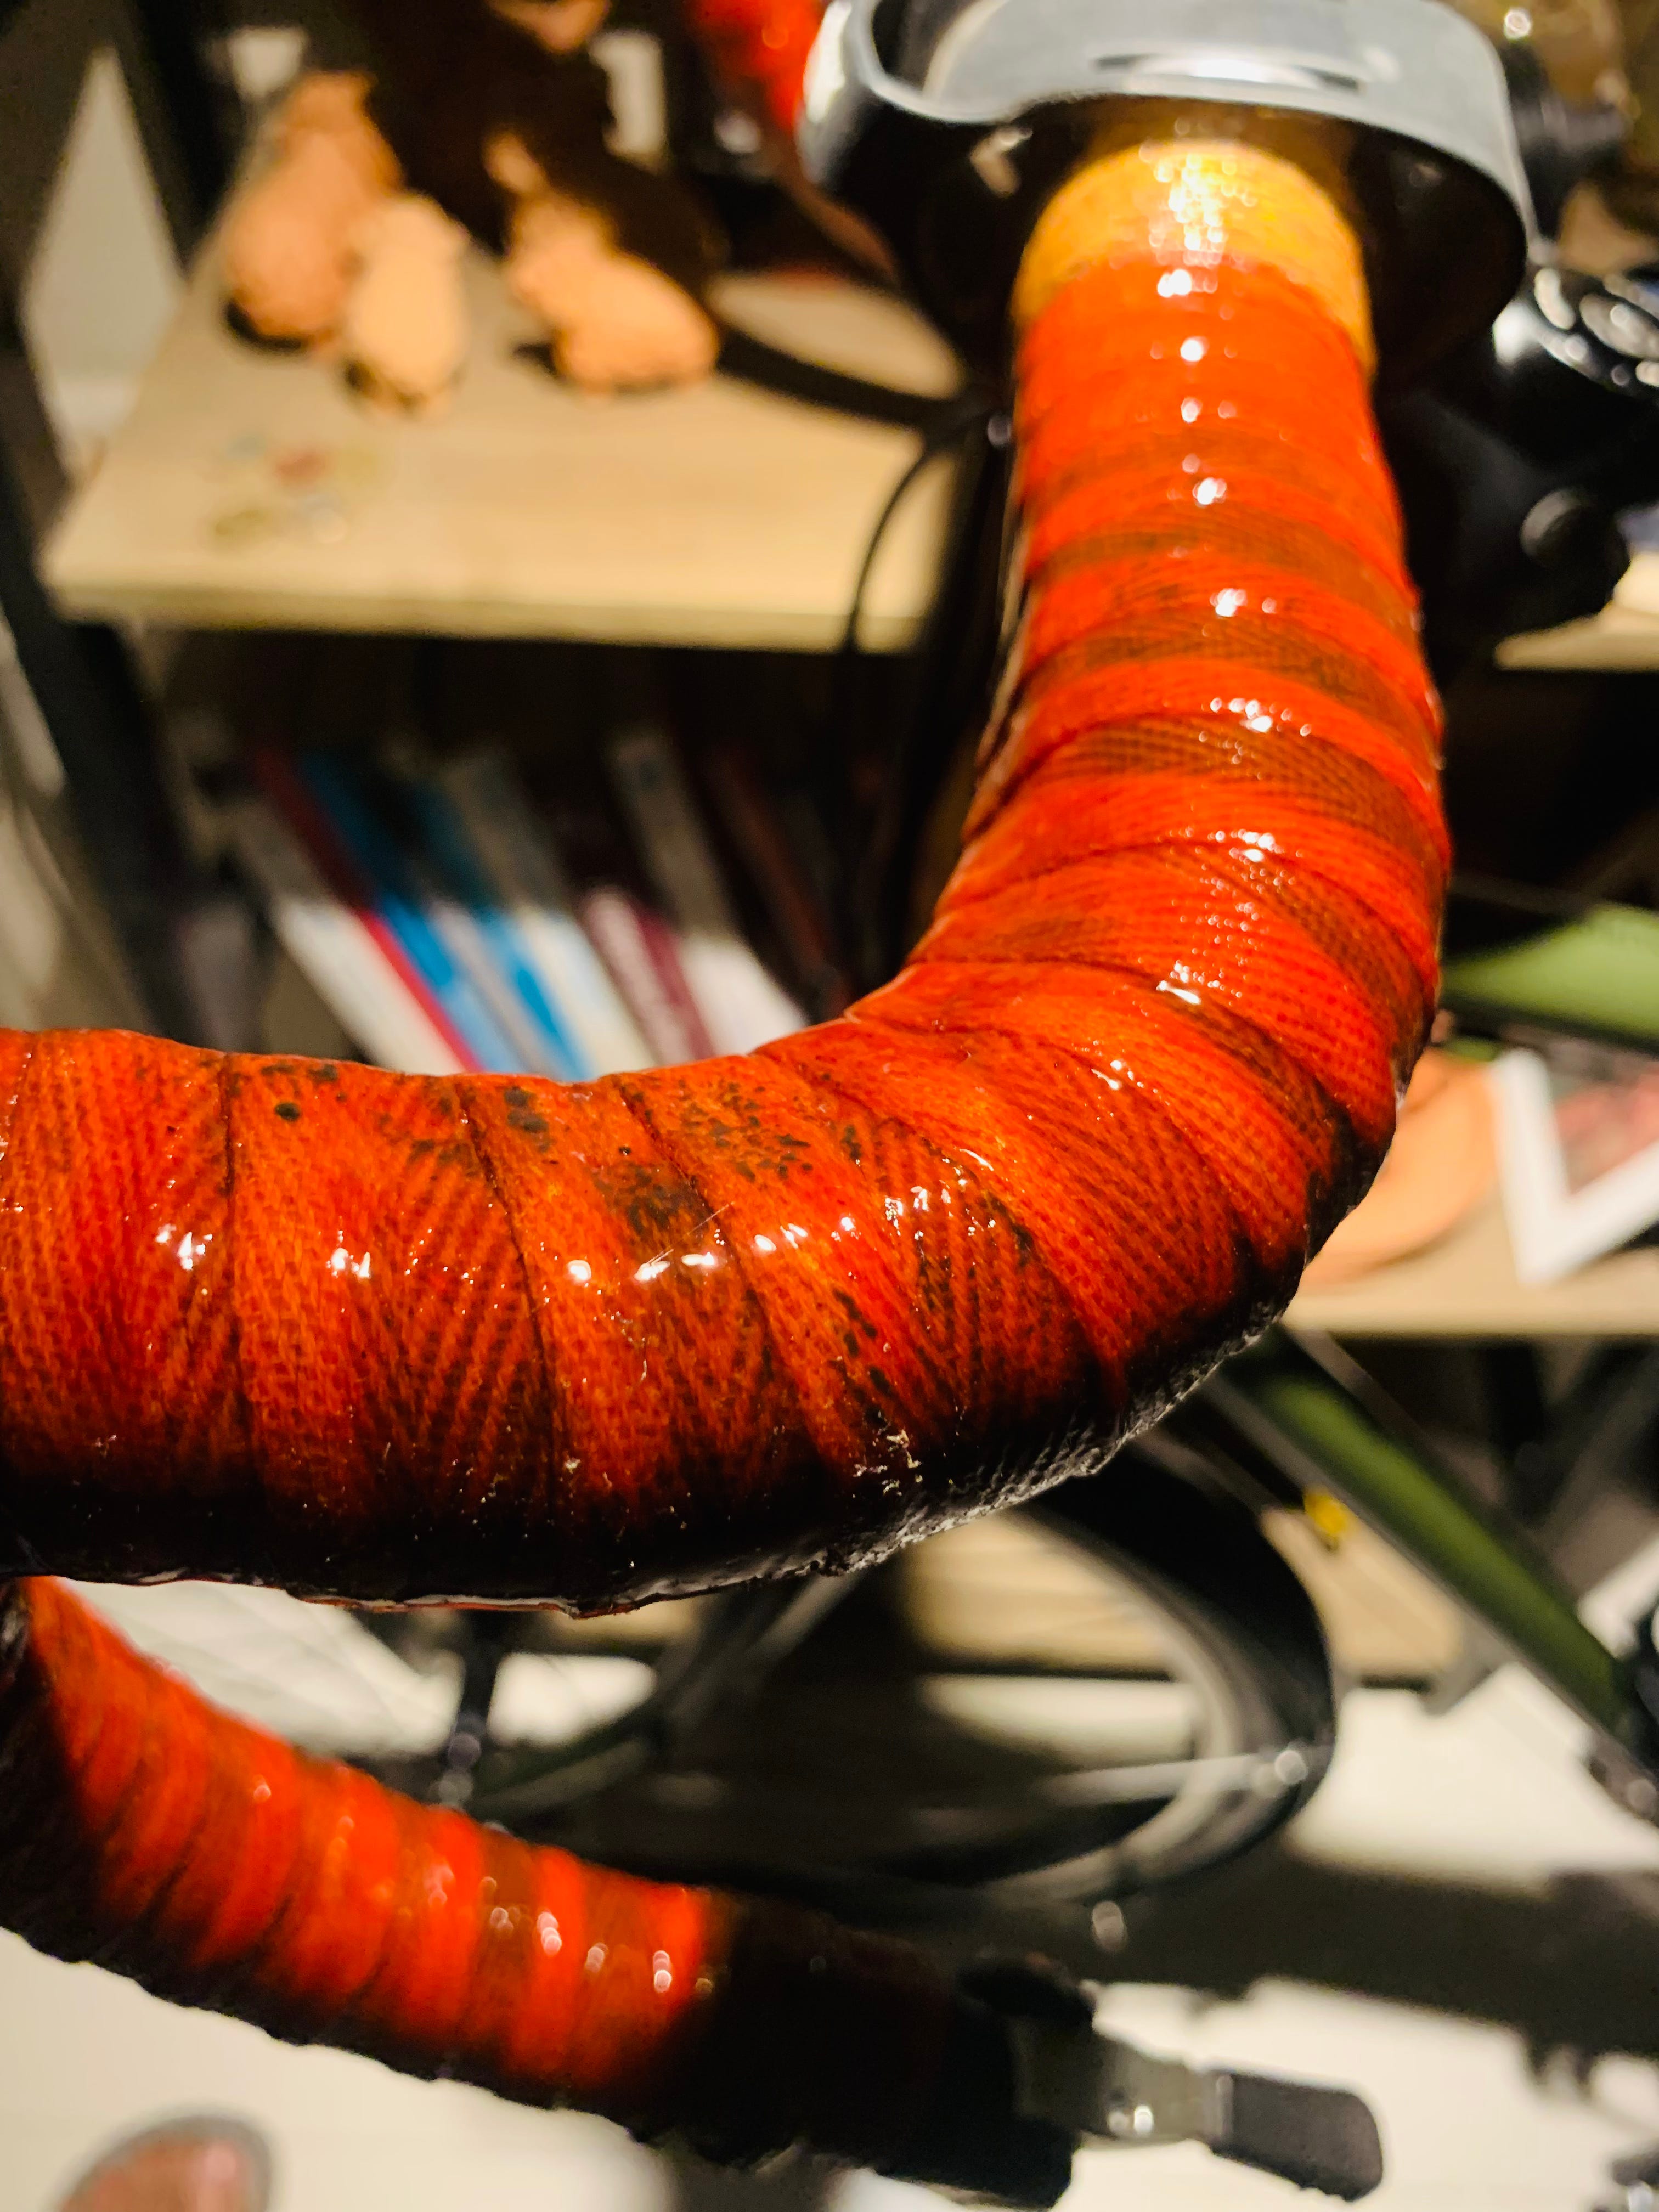
The result, as you can see, is drool-worthy! I would highly encourage the brave ones to ditch the conventional handlebar tape, and try out shellac coating!
One tip though — you may want to have a base layer of cork bar tape, and then cloth tape (the one you’d put shellac on) over it. This makes it more comfortable.
https://velo-orange.com/pages/shellac-and-bar-tape-a-guide
https://www.outyourbackdoor.com/articles/bikes_a/shellac-twine-makes-handlebar-fine-428/